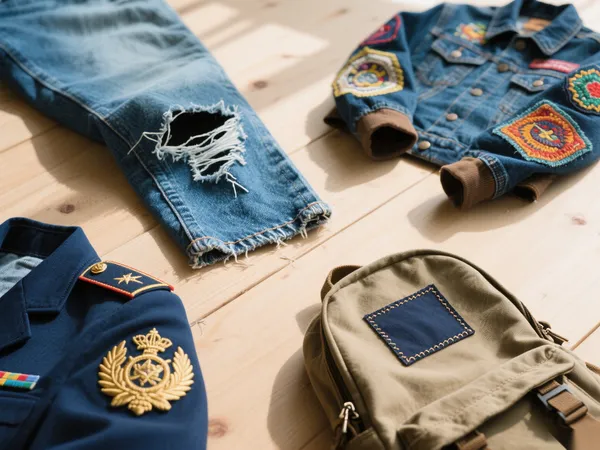
Whether you’re repairing torn fabric, customizing your denim jacket, or attaching a uniform badge, learning how to sew patches is a skill that blends functionality with creativity. Unlike iron-on methods, sewing offers a permanent and durable solution that works across all types of fabric.
In this guide, we’ll explore the best techniques for how to sew patches on clothes, when to use hand sewing vs. machine sewing, and helpful tips for beginners and pros alike.
Why Choose to Sew Patches?
Sewing patches has been the go-to method long before heat-activated adhesives became popular. Here’s why it still holds up:
- Stronger hold than iron-on glue
- Obras en any fabric type, including heat-sensitive materials
- Gives a vintage or rugged aesthetic
- Can be used on decorative, repair, or branding patches
Whether you’re patching up a hole or adding flair to your gear, sewing ensures that the patch stays secure wash after wash.
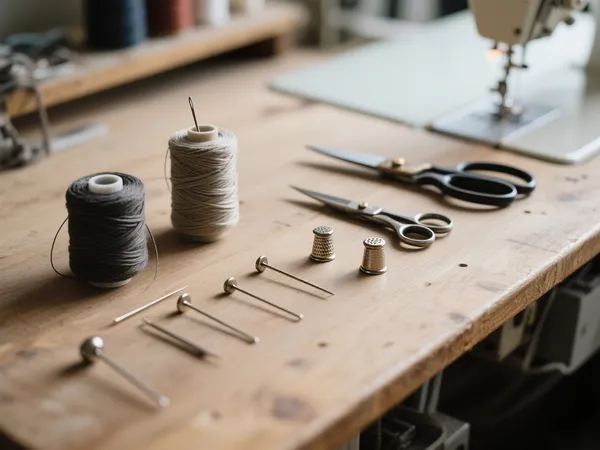
Herramientas que necesitarás
Before you get started, gather the right tools:
For Hand Sewing:
- Needle (sharp, with a small eye for thicker threads)
- Thread (preferably heavy-duty or matching patch color)
- Scissors
- Thimble (optional but helpful)
- Pins or fabric glue (to hold patch in place temporarily)
For Machine Sewing:
- Sewing machine with a zigzag or straight stitch setting
- Heavy-duty thread
- Appropriate needle for the fabric (e.g., denim, leather, cotton)
- Seam ripper (in case of mistakes)
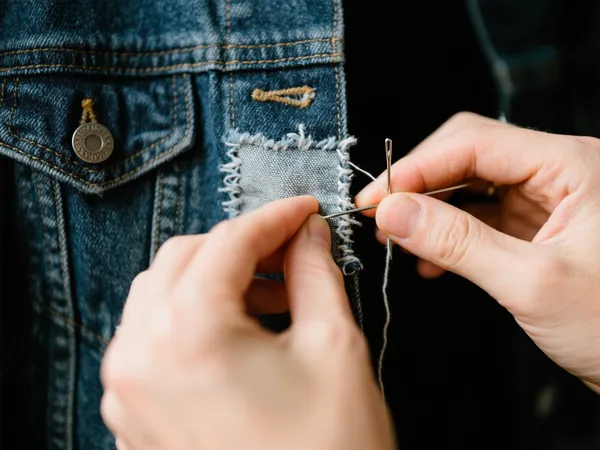
How to Sew Patches by Hand
Hand sewing is ideal for small patches, irregular areas, or thicker garments like jackets and backpacks.
Instrucciones paso a paso:
- Coloque el parche
Place the patch exactly where you want it on the garment. Use pins or a dab of fabric glue to hold it in place. - Thread Your Needle
Choose a thread color that matches the edge of the patch or contrasts for style. Knot the end of the thread. - Start Sewing
Use a whip stitch or running stitch:- Insert the needle from underneath the fabric.
- Pull it through both the patch and the garment.
- Repeat, spacing stitches evenly (about ⅛” apart).
- Secure the Stitch
Once you’ve stitched around the entire patch, knot the thread securely on the inside of the garment.
✂️ Pro Tip: For thick patches like chenille or embroidered styles, use a curved needle to reduce strain on your hands.
How to Sew Patches with a Sewing Machine
If you’re working with many patches or large garments, a machine can save time and ensure clean, even stitches.
Instrucciones paso a paso:
- Prepare the Machine
- Use a heavy-duty needle and thread.
- Select a straight stitch for a clean look or zigzag for extra hold.
- Pin the Patch
Align the patch and use pins or temporary adhesive to secure it. - Start Stitching
- Begin at one corner.
- Slowly stitch around the perimeter, staying close to the edge (about 1–2 mm).
- Pivot at corners by lifting the presser foot and rotating the fabric.
- Finish and Secure
Backstitch slightly at the end to lock the seam. Trim excess threads.
🧵 Machine sewing is best for flat patches on flexible garments like denim, uniforms, or work shirts.
Choosing the Right Stitch for Your Patch
| Stitch Type | Use Case |
|---|---|
| Puntada recta | Clean edge, subtle appearance |
| Zigzag Stitch | Decorative + durable for active wear |
| Puntada continua | Fast and light, ideal for hand-sewing |
| Puntada de manta | Decorative and visible around patch edges |
| Hidden (Blind) Stitch | Invisible seams on delicate or formal fabrics |
Best Fabrics to Sew Patches On
Sewing is safe on nearly all fabrics, but the following are most patch-friendly:
- Dril (jeans, jackets)
- Lienzo (bags, vests)
- Cotton (shirts, uniforms)
- Leather (requires heavy-duty tools)
- mezclas de poliéster (low heat resistance, so sewing is safer than ironing)
⚠️ Avoid iron-on-only patches for sewing unless you remove or bypass the glue layer first.
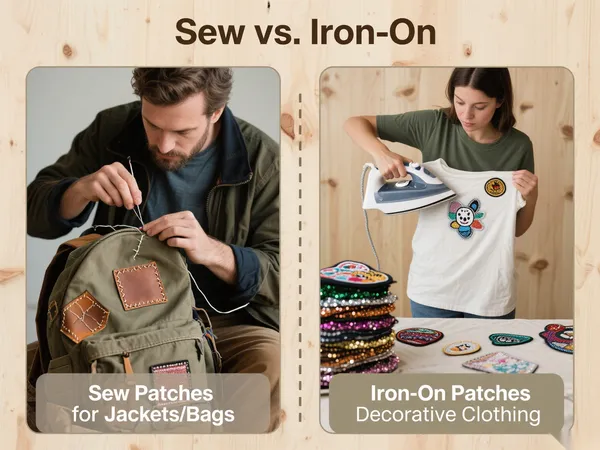
When to Sew vs. Iron-On
| Sew Patches | Parches termoadhesivos |
|---|---|
| Durable y de larga duración | Quick and easy for temporary designs |
| Works on all fabrics (even delicate or heat-sensitive) | Limited to heat-tolerant materials |
| Ideal for rough use (jackets, bags, uniforms) | Best for light-use or decorative clothing |
| Requires some time and skill | Can be applied in minutes with an iron |
Reflexiones finales
Aprendiendo a sew patches opens up endless possibilities—whether you’re personalizing your wardrobe, mending old clothes, or displaying achievements with pride. With just a needle and thread (or a sewing machine), you can transform any garment into a custom piece that reflects your identity, creativity, or purpose.
So grab that jacket, line up your patches, and start stitching your story—one patch at a time.