إن إضافة رقعة إلى ملابسك أو إكسسواراتك ليس مجرد وسيلة لإصلاح الثقوب، بل هو شكل من أشكال التعبير عن الذات والأناقة وحتى العلامة التجارية. سواءً كنت تُصلح سترةً عزيزةً، أو تُخصّص حقيبة ظهرك، أو تُزيّن شارة فريقك، فإنّ إتقان خياطة رقعةٍ بشكلٍ صحيح يُحدث فرقًا كبيرًا في المتانة والمظهر. في هذا الدليل الشامل، سنشرح لك أساسيات استخدام رقعة خياطة، واستكشاف أساليب مختلفة، وتقديم نصائح مفيدة لجعل عملك نظيفًا واحترافيًا.

لماذا تختار رقعة الخياطة بدلاً من المكواة؟
في حين توفر الرقع المكواة تطبيقًا سريعًا، sewing patches لقد صمدت أمام اختبار الزمن. إليك بعض المزايا الرئيسية:
- متانة أكبر:تميل الرقع المخيطة إلى أن تدوم لفترة أطول، خاصة بعد غسلها عدة مرات.
- يعمل على الأقمشة الصعبة:قد لا تتفاعل المواد مثل الجلد أو الصوف بشكل جيد مع الحرارة، مما يجعل الخياطة الخيار الأفضل.
- وضع مخصص:تتيح الخياطة مزيدًا من التحكم في مكان وكيفية وضع الرقعة، خاصةً على الأسطح المنحنية أو غير المستوية.
الخياطة ضرورية أيضًا عندما تكون الرقعة زخرفية بحتة أو تفتقر إلى دعامة لاصقة.
أنواع الرقع التي يمكنك خياطتها
هناك عدة أنواع من الرقع المُصممة للخياطة، منها:
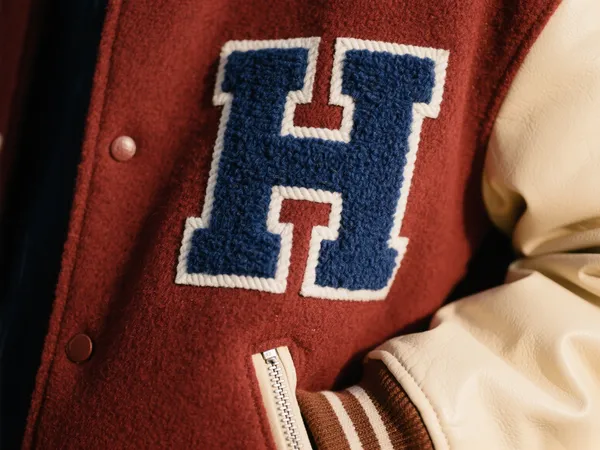
- Embroidered patches:تستخدم غالبًا في الزي الرسمي والسترات.
- رقع منسوجة:تشتهر بالتفاصيل المعقدة والخيوط الدقيقة.
- بقع مطبوعة:عادةً للشعارات أو الأعمال الفنية أو التصاميم التفصيلية.
- رقعة جلدية أو بلاستيكية:تتطلب خيوطًا وإبرًا ثقيلة ولكنها تقدم أسلوبًا فريدًا.
يساعدك فهم نوع الرقعة التي تعمل عليها على اختيار الأدوات والتقنيات المناسبة للخياطة.
الأدوات التي ستحتاجها
قبل أن تبدأ، قم بجمع ما يلي:
- إبرة حادة (يعتمد الحجم على القماش وسمك الرقعة)
- خيط قوي (مطابقة الألوان أو التباين)
- كشتبان (خاصة بالنسبة للبقع السميكة)
- Scissors
- دبابيس أو غراء القماش (لتثبيت الرقعة في مكانها)
- ممزق الدرزات (لأي أخطاء)
- خياري: ماكينة الخياطة إذا كنت تعمل بحجم كبير أو تريد خياطة فائقة النظافة
كيفية خياطة الرقعة يدويًا
الخطوة 1: وضع الرقعة
حدد مكان الرقعة. ضعها بالتساوي وفي المنتصف، إن لزم الأمر. استخدم دبابيس أو القليل من غراء القماش لتثبيتها مؤقتًا.
الخطوة 2: قم بربط الإبرة
اقطع حوالي ١٨ بوصة من الخيط واربط طرفه. يُنصح باستخدام خيط مزدوج لمزيد من المتانة.
الخطوة 3: ابدأ الخياطة
ابدأ من داخل القماش لإخفاء العقدة. استخدم طريقة بسيطة غرزة مستقيمة أو غرزة السوط حول الحواف. حافظ على الغرز قريبة من بعضها البعض (بمسافة ⅛ إلى ¼ بوصة) للأمان.
الخطوة 4: الانتهاء بدقة
بعد الانتهاء من لفّ الخيط حول نفسه، اربط عقدة صغيرة من الداخل واقطع الخيط الزائد. يمكنك أيضًا لفّ الخيط حول نفسه مرتين لمزيد من المتانة.

استخدام ماكينة الخياطة للرقع
إذا كنت تفضل الخياطة الآلية:
- اختر غرزة متعرجة للحصول على تثبيت آمن ونهاية نظيفة.
- يختار شد الخيط ونوع الإبرة بناءً على الرقعة ومادة الملابس.
- قم دائمًا بإجراء غرزة اختبارية على قطعة قماش أولاً.
تعتبر الخياطة الآلية مثالية لترقيع كميات كبيرة (على سبيل المثال، الزي الرسمي والبضائع) وتعطي نتيجة مصقولة واحترافية.

الأخطاء الشائعة التي يجب تجنبها
- رقعة غير محاذية:قم دائمًا بتثبيت الدبوس والتحقق من وضعه قبل الخياطة.
- خياطة ضيقة جدًا:قد يؤدي هذا إلى تجعد القماش.
- استخدام خيط ضعيف:قد ينكسر تحت الضغط أو يتآكل بسرعة أثناء الغسيل.
- عدم الخياطة الخلفية:في بداية ونهاية الخياطة، تمنع الخياطة الخلفية التفكك.
إن تخصيص وقتك والتحقق من عملك أثناء كل خطوة يمكن أن يساعد في تجنب هذه المشاكل.
استخدامات إبداعية لرقعة الخياطة
لا يمكن إصلاح الرقع، فهي تُستخدم على نطاق واسع للتخصيص والتصميم:
- سترات الدنيم مع بقع قديمة أو بقع لفرق الروك
- الزي العسكري مع معرفات الاسم والرتبة
- عضويات النادي مع شعارات مطرزة
- حقائب الظهر والقبعات مع الذوق أو العلامة التجارية
- ملابس الأطفال مع تصاميم ممتعة وملونة
عندما يتم خياطتها بشكل صحيح، تصبح هذه الرقع عملية وجميلة، مما يضيف الشخصية والاحترافية إلى الملابس.

نصائح الصيانة والغسيل
بمجرد خياطة الرقعة الخاصة بك، فإن العناية بها لا تزال مهمة:
- اغسل الملابس من الداخل إلى الخارج لتقليل الاحتكاك.
- استخدمي منظفًا خفيفًا وماءً باردًا.
- تجنب التجفيف بالحرارة العالية، فالتجفيف بالهواء هو الأفضل.
- تحقق من الغرز من حين لآخر وقم بتعزيزها إذا لزم الأمر.
يمكن أن تدوم الرقع المخيطة جيدًا لسنوات دون أن تتآكل أو تنفصل.
خاتمة
إن تعلم خياطة رقعة يمنحك فرصًا لا حصر لها لإصلاح وتخصيص وتزيين متعلقاتك. باستخدام الأدوات والتقنيات المناسبة، خياطة رقعة تصبح مهارة مجزية تضمن طول العمر والأناقة.
سواءً كنت تُرقّع تمزقًا، أو تُبرز فخرك بفريقك، أو تُخصّص مظهرك، فإن العملية بسيطة، مُرضية، ودائمة. لذا في المرة القادمة التي تُفكّر فيها في إضافة رقعة، أحضر إبرة وخيطًا - لديك كل ما تحتاجه لجعلها تبدو رائعة وتدوم طويلًا.