لماذا تُعدّ الرقع المُكوية أسهل طريقة لتخصيص ملابسك
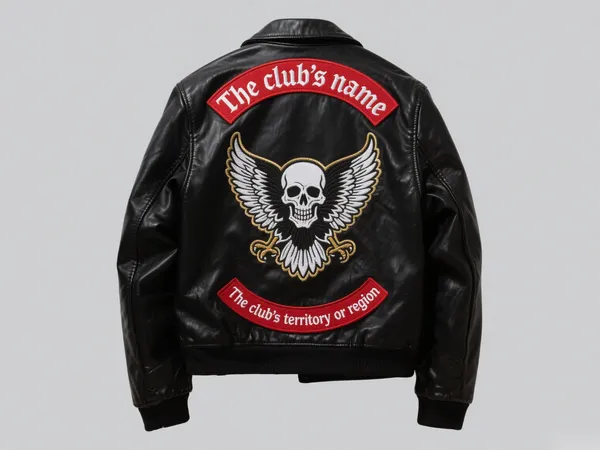
تُقدم الرقع التي تُكوى حلاً سريعًا وبدون خياطة لتخصيص السترات والحقائب والقبعات وغيرها. سواءً كنت تُغطي ثقبًا، أو تُضيف لمسةً أنيقةً إلى الجينز، أو تُصمم أزياءً رسميةً، فإن التعلم كيفية كي الرقعة يضمن بشكل صحيح بقاءه آمنًا ويبدو احترافيًا.
في هذا الدليل سوف تكتشف:
✔ الأدوات والمواد المناسبة لتطبيق ناجح
✔ تعليمات الكي على الرقعة خطوة بخطوة
✔ الأخطاء الشائعة لتجنب
✔ كيفية جعل الرقع تدوم لفترة أطول

ما ستحتاجه لكي الرقعة
قبل البدء، قم بجمع هذه الأساسيات:
- Iron (مكواة منزلية قياسية، بدون بخار)
- Ironing board أو سطح صلب ومقاوم للحرارة
- كي القماش (قماش قطني رقيق أو ورق زبدة)
- رقعة (تأكد من أنه يحتوي على مادة لاصقة يتم تنشيطها بالحرارة)
- ملاقيط (للوضع الدقيق)
خياري:
- غراء القماش (للتعزيز الإضافي)
- الإبرة والخيط (للمناطق ذات الضغط العالي)
خطوة بخطوة: كيفية كيّ الرقعة بشكل مثالي
الخطوة 1: تحضير القماش
- اغسل الملابس وجففها (تجنب استخدام منعم الأقمشة لأنه يقلل من الالتصاق).
- اقلب القطعة من الداخل للخارج وضعها بشكل مسطح على لوح الكي.
- إذا كنت تريد سد ثقب، ضع الورق المقوى داخله لمنع تسرب الغراء.
الخطوة 2: وضع التصحيح
- استخدم الملقط لوضع الرقعة بالضبط حيث تريدها.
- للحصول على محاذاة دقيقة، قم بتأمينها باستخدام دبابيس الخياطة أو القليل من غراء القماش.
الخطوة 3: تسخين المكواة
- اضبط المكواة على قطن أو إعداد حرارة عالية (لا يوجد بخار).
- اتركها تسخن تمامًا (عادةً لمدة 2-3 دقائق).
الخطوة 4: تطبيق الحرارة
- قم بتغطية الرقعة بـ الضغط على القماش لحماية التصميم.
- اضغط لأسفل بقوة 30-45 ثانية (استخدم حركات دائرية للحصول على حرارة متساوية).
- اقلب الثوب وكرر ذلك على الجانب الخلفي للحصول على رابط أقوى.
الخطوة 5: التبريد والاختبار
- اترك الرقعة لتبرد تمامًا (10-15 دقيقة).
- قم بالسحب بلطف على الحواف للتحقق من الالتصاق.
- إذا كانت فضفاضة، قم بإعادة تسخينها ثم اضغط عليها مرة أخرى.
الخطوة 6: التعزيز (اختياري)
- لمزيد من المتانة، قم بالخياطة حول الحواف أو أضف غراء القماش.
الأخطاء الشائعة عند كيّ الرقع
❌ استخدام Steam - الرطوبة تضعف المادة اللاصقة.
❌ حرارة غير كافية - لن يتم تنشيط الغراء بشكل كامل.
❌ تخطي الضغط على القماش - قد يؤدي إلى ذوبان الرقعة أو تغير لونها.
❌ تحريك الحديد كثيرًا - يسبب التصاق غير متساوي.
كيفية جعل الرقع المكوية تدوم لفترة أطول
✔ اغتسل بالخارج - يمنع الضرر الناتج عن الاحتكاك.
✔ الماء البارد فقط - الماء الساخن يؤدي إلى تفكيك المادة اللاصقة.
✔ تجفيف بالهواء - يمكن للحرارة العالية في المجففات أن تؤدي إلى إعادة إذابة الغراء.
✔ تجنب المبيضات - يضعف كل من القماش والرقعة.
أفضل الأقمشة للرقع المكوية
| قماش | هل يعمل بشكل جيد؟ | ملحوظات |
|---|---|---|
| Cotton | ✅ نعم | مثالي للالتصاق القوي |
| الدنيم | ✅ نعم | قد يحتاج القماش السميك إلى حرارة أطول |
| Polyester | ⚠️ في بعض الأحيان | استخدم حرارة أقل لتجنب الذوبان |
| نايلون | ❌ لا | الحرارة العالية قد تؤدي إلى إتلاف القماش |
| جلد | ❌ لا | استخدم غراء القماش بدلا من ذلك |
متى يجب الخياطة بدلاً من الكي؟
- المناطق ذات الضغط العالي (الركبتين والمرفقين)
- الأقمشة المطاطة (ملابس رياضية)
- المواد الحساسة (الحرير، المخمل)

الأسئلة الشائعة حول الرقع الكيّية
س: هل يمكن كي الرقع بدون مكواة؟
ج: نعم! استخدمي مكواة شعر (غطّيها بقطعة قماش) أو مكبسًا حراريًا.
س: لماذا تتساقط الرقعة الخاصة بي بعد الكي؟
ج: على الأرجح بسبب عدم كفاية الحرارة أو البخار أو القماش غير المناسب. أعد تسخينه أو خياطته.
س: كم عدد الغسلات التي تدومها الرقع المكواة؟
أ: عادة 20-50 غسلة قبل أن تحتاج إلى التعزيز.
س: هل يمكنك كي الرقع على القبعات؟
ج: نعم، ولكن استخدم سطحًا مستديرًا (مثل وعاء زجاجي) داخل القبعة.
طرق مبتكرة لاستخدام الرقع المكواة
- إحياء الجينز القديم مع بقع زهرية أو بانك
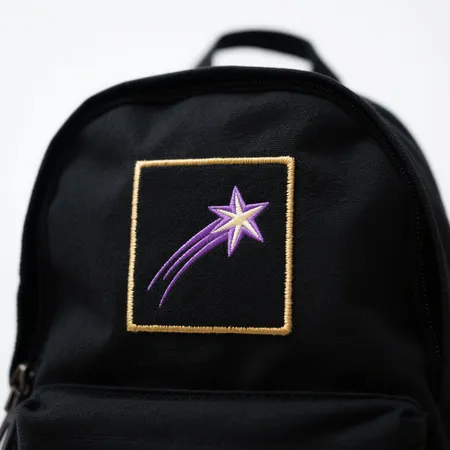
- تخصيص حقائب الظهر للمدرسة أو السفر
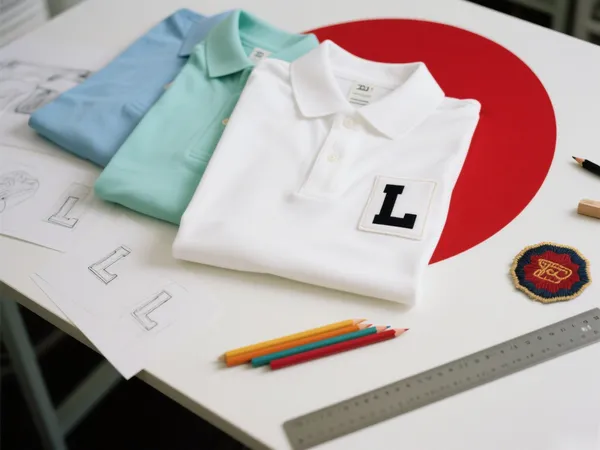
- ملابس عمل ماركة مع شعارات الشركة
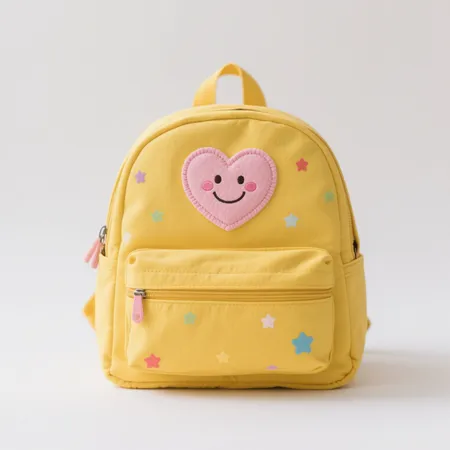
- بقع الغطاء على ملابس الأطفال
نصائح أخيرة للحصول على بقع مثالية
- قم دائمًا بالاختبار على منطقة مخفية أولاً.
- للحصول على تصميمات معقدة، اختر رقعة مخصصة للكي.
- قم بتخزين الفائض في مكان بارد وجاف للحفاظ على المادة اللاصقة.
الآن بعد أن عرفت كيفية كي الرقعةلقد حان الوقت لتحديث خزانة ملابسك! 🚀
هل تحتاج إلى تصحيحات مخصصة؟ احصل على تصميمات عالية الجودة وطويلة الأمد اليوم!